Tiling a shower floor may seem like a straightforward task, but there are numerous factors to consider that can determine the long-term success of the installation. While a beautifully tiled shower adds visual appeal to a bathroom, the true measure of success lies in how well it prevents leaks and maintains its durability over time. A shower floor needs to be both waterproof and built to handle constant exposure to moisture, and achieving this requires careful planning, the right techniques, and attention to detail.
In this guide, we’ll walk you through the essential steps and techniques required to tile a shower floor successfully. From preparing the surface to ensuring proper drainage, we’ll cover all the critical elements that help guarantee a waterproof and long-lasting result.
1. Preparing the Shower Base: The Foundation for Success
Before you begin tiling, it’s crucial to start with a properly prepared surface. The shower base, or substrate, forms the foundation of the entire installation, and if it isn’t done right, even the most beautiful tile won’t last.
Choosing the Right Shower Pan
A shower pan or base is typically pre-sloped to ensure water flows toward the drain. While you can build your own sloped base using mortar, many people opt for pre-fabricated shower pans for convenience and precision.
- Pre-Sloped Bases: If you’re installing a prefabricated shower pan, make sure it’s securely fixed and level. These bases are designed to create the ideal slope for water to flow toward the drain, minimizing the risk of standing water or leakage.
- Mortar Beds: If you’re going for a custom look or working with irregular spaces, a mortar bed may be the better option. To create a proper slope (typically ¼ inch per foot), you’ll need to carefully form the mortar bed. This slope ensures water flows efficiently toward the drain, which is crucial for preventing water buildup and leaks.
Waterproofing: The Essential Step
Waterproofing is arguably the most critical step in shower floor installation. A waterproof barrier prevents moisture from seeping into the walls, floor, or subfloor, which can cause mold, mildew, and structural damage over time. Many waterproofing methods exist, and choosing the right one is essential for long-term durability.
- Waterproof Membranes: Waterproofing membranes, such as liquid-applied membranes or sheet membranes, are popular choices for shower floors. These membranes are applied over the mortar bed or pre-fabricated base, creating a watertight seal. They’re flexible and easy to install, forming an impermeable layer that protects against leaks.
- Cement Backer Boards: Another option is to install a cement backer board on the walls and floor of the shower before tiling. While cement boards themselves are water-resistant, they’re not waterproof. You’ll still need to apply a waterproof membrane on top to prevent water from penetrating.
The key to effective waterproofing is thoroughness—every seam, corner, and edge must be covered. Missing even a small area can compromise the entire shower, leading to costly repairs in the future.
2. Laying the Tile: Slope, Drainage, and Proper Techniques
Once the waterproofing is complete, you can begin laying the tile. But even here, attention to detail is critical to ensure that water drains correctly and that the floor remains slip-resistant and durable.
Selecting the Right Tile for the Shower Floor
Shower floors are exposed to constant moisture, so it’s important to choose a tile that’s both slip-resistant and water-resistant.
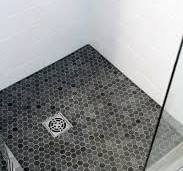
- Mosaic Tiles: Mosaic tiles, which are small and typically mounted on mesh sheets, are an excellent choice for shower floors. The smaller size allows for more grout joints, which helps with traction and makes the surface less slippery when wet. The flexibility of mosaic sheets also makes it easier to conform to the slope of the floor.
- Slip Resistance: When selecting tiles for your shower floor, always check the slip-resistance rating. Tiles with a high slip-resistance rating (often indicated by a high coefficient of friction or COF) are ideal for wet areas. Natural stone, textured porcelain, and matte-finished tiles are popular for shower floors because of their non-slip properties.
Dry Laying Tiles to Plan the Layout
Before applying any adhesive, it’s a good idea to dry-lay your tiles to plan the layout. This step ensures that you achieve even spacing and that any cuts you need to make are accurate. Dry-laying helps you visualize the final look and adjust for tricky areas like the drain or edges.
- Centering the Drain: Start laying tiles at the center, typically where the drain is, and work your way outward. For mosaic tiles, it’s crucial to make sure the drain sits flush with the tile surface for a seamless look and proper drainage.
- Cutting Edge Tiles: In some cases, you’ll need to cut tiles to fit the edges of the shower. Use a tile cutter or wet saw for precise cuts, ensuring the tiles fit snugly without large gaps that could allow water to seep through.
Applying Thin-Set Mortar
Once your layout is planned, it’s time to apply the thin-set mortar (tile adhesive). Be sure to use a thin-set mortar that’s rated for wet environments and suitable for the type of tile you’re installing.
- Trowel Size: Use a notched trowel that matches the size of your tile. Larger tiles may require a deeper notch to ensure adequate adhesion, while smaller tiles like mosaics require a smaller notch.
- Ensuring Coverage: It’s important to achieve full coverage on the back of each tile. This ensures the tile adheres securely and prevents water from seeping underneath. As you press each tile into place, twist slightly to embed it into the mortar.
Grouting the Tiles
After the mortar has set (typically 24 hours), you can begin the grouting process. Grout not only holds the tiles in place but also plays a role in waterproofing by sealing the joints between tiles.
- Choosing the Right Grout: For shower floors, epoxy grout is often the best choice because it’s highly resistant to moisture and stains. Unlike cement-based grout, epoxy grout doesn’t require sealing and is less likely to crack or discolor over time.
- Applying Grout: Use a grout float to work the grout into the joints, holding the float at a 45-degree angle to ensure full penetration. Wipe away excess grout with a damp sponge, being careful not to remove too much grout from the joints.
3. Ensuring Proper Drainage: The Key to Preventing Leaks
Water naturally flows to the lowest point, which should be the drain. However, ensuring the correct slope of the shower floor is crucial for this to happen effectively.
The Importance of the Slope
The floor should slope toward the drain at about 1/4 inch per foot. This slope ensures that water doesn’t pool on the tiles and instead flows directly into the drain. If the slope isn’t correct, water can linger on the surface, leading to potential leaks, mold, and mildew growth over time.
- Checking the Slope: After the tiles are set but before the grout is applied, use a level to double-check the slope of the shower floor. This final check ensures that water will drain properly and there won’t be any areas where water pools.
Waterproofing the Drain Area
The drain is a critical point of vulnerability in any shower floor installation. A proper seal around the drain is essential to prevent leaks.
- Drain Flange: Make sure the waterproofing membrane is properly integrated with the drain flange. This will create a watertight seal where the tile meets the drain, preventing any water from seeping through.
- Weep Holes: If your shower drain has weep holes (small holes designed to allow moisture to escape), make sure they aren’t blocked by grout or tile adhesive. These holes help prevent moisture buildup under the tiles, which can lead to mold or mildew.
4. Final Touches: Sealing and Maintaining the Shower Floor
Once the tiles are in place and the grout has been applied, sealing the grout is the final step to ensure your shower floor remains durable and leak-proof over time.
Sealing the Grout
While epoxy grout doesn’t require sealing, cement-based grout should be sealed to protect it from moisture, stains, and cracking. A good-quality grout sealer creates a protective barrier that helps keep water and soap residue out of the grout lines.
- How Often to Seal: For cement-based grout, it’s a good idea to reapply a grout sealer every year or two, depending on how much moisture the shower floor is exposed to. Regular maintenance keeps your grout looking fresh and prevents moisture-related issues.
Ongoing Maintenance
Even with a properly tiled and waterproofed shower floor, ongoing maintenance is key to ensuring it stays in top condition. Regularly clean the grout lines and tiles to remove soap scum and prevent mildew. Avoid using harsh chemicals, which can break down the grout or damage the tile finish.
Conclusion: Why Proper Techniques Are Essential for a Leak-Proof Shower
Tiling a shower floor is a complex process that requires more than just laying tiles. From ensuring proper waterproofing to managing the slope and drain installation, each step plays a critical role in preventing leaks and ensuring the durability of the shower. By focusing on these key techniques and taking the time to plan and execute each step correctly, you can achieve a beautiful, waterproof, and long-lasting shower floor that adds value and functionality to your bathroom.
Understanding these techniques highlights the importance of a well-planned and expertly executed installation—one that avoids costly mistakes and ensures that your shower remains a functional, leak-proof space for years to come.


